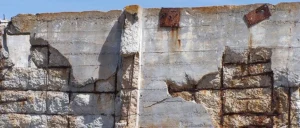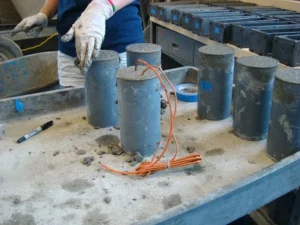

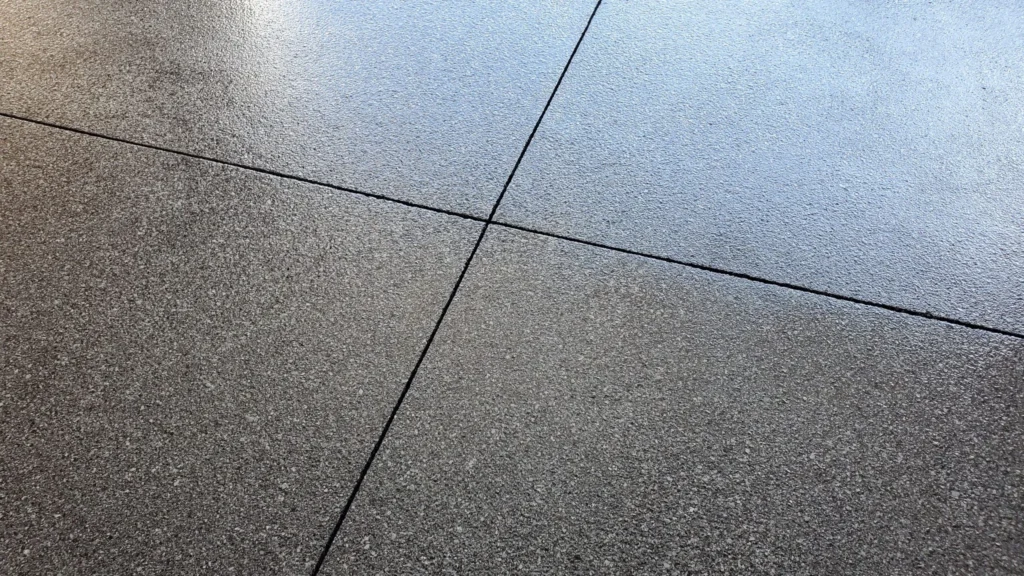
A Symons Valley homeowner watched the saw crew cut 6 mm joints on her new 5-inch driveway 13 hours after the pour. By April the cracks ran between the joints — and her contractor blamed “Calgary settling.” It wasn’t. It was five control-joint decisions, made wrong in the first 24 hours: depth, spacing, timing, isolation, corners.
Here is the thing nobody tells you when you sign the driveway contract: concrete is going to crack. That is not a defect — it is what concrete does as it cures and shrinks. The entire job of a control joint is to decide where that crack happens, giving the slab a deliberate weak line so it cracks neatly down in the joint, out of sight, instead of wandering across the surface.
So when a new Calgary driveway cracks between the joints in its first winter, the slab did not fail. The jointing plan failed. And because every one of these five decisions is made in the first 24 hours — most in the first 12 — by the time you notice the crack in April, the window to do it right closed months ago. This guide hands you the exact specs and questions, whether you are diagnosing a slab you already own or vetting the next crew before they pour.
Before worrying about control joints, make sure the slab meets every inspection requirement. Read our guide on 8 concrete specs a Calgary inspector checks on your residential driveway or garage pad to understand the structural and documentation requirements inspectors verify before approving residential concrete.
1. Saw-cut depth under 25% of slab thickness (the most-violated joint spec in Calgary residential work)
The single most common reason a new driveway cracks between its joints is that the joints were cut too shallow. The rule is simple and it is not negotiable: a control joint must be cut to at least 25% of the slab’s thickness. This is the figure ACI 302.1R (Guide to Concrete Floor and Slab Construction) gives for saw-cut contraction joints, and CSA A23.1:24 treats jointing depth and layout as part of the finishing requirements the placing contractor owns.
Run the math on a typical Calgary residential driveway. Most are poured at 5 inches (125 mm) — the standard for a slab that will see a parked vehicle and the occasional delivery truck. Twenty-five percent of 5 inches is 1.25 inches of cut depth. On a 4-inch sidewalk slab, the joint needs to be 1 inch deep. On a 6-inch slab built for an RV or a loaded trailer, you are looking at 1.5 inches.
A joint shallower than 25% does not create a reliable weak plane. The concrete below the cut is still nearly full-thickness and nearly full-strength, so when the slab shrinks, the tension is not concentrated at the joint — it goes looking for the next weakest point, which might be three feet away in the middle of the panel. That is the crack you end up staring at. In the Symons Valley example that opens this article, the 6 mm joints worked out to roughly 0.24 inches of depth on a 5-inch slab — under one-fifth of what the spec calls for. The slab did exactly what an under-cut slab does.
Here is what you can actually inspect. If the driveway is already poured, slide a thin ruler or a folded business card into the joint and feel for the bottom. On a 5-inch slab you want to feel resistance at roughly 1.25 inches, not at a quarter-inch. If you are vetting a crew before the pour, ask one question: “How deep are you cutting the control joints, and what’s the slab thickness?” The answer should be a ratio you can check — “quarter-inch cuts on a five-inch slab” is the wrong answer, and now you know why. A crew that cannot tell you the cut depth in inches is a crew that is not measuring it.
2. Joint spacing beyond 24–36× the slab thickness
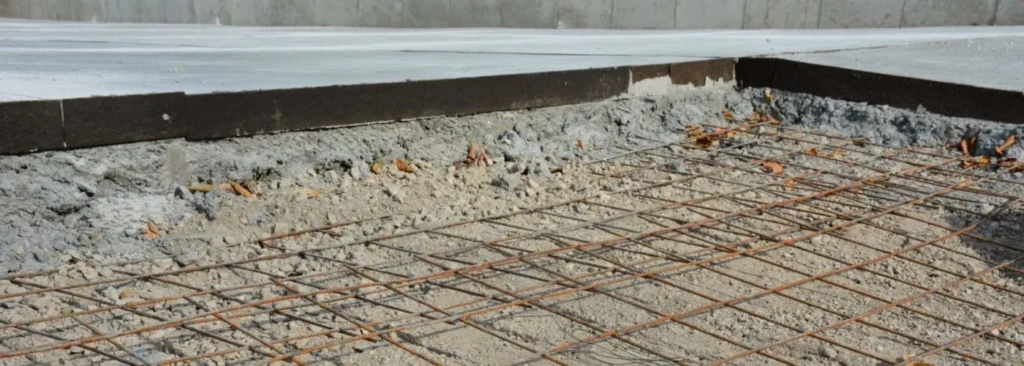
Depth decides whether the joint works. Spacing decides whether you have enough of them. Put the joints too far apart and even perfectly cut joints will not save you, because there is too much uninterrupted slab between them — too much shrinkage building up with nowhere to release except a random mid-panel crack.
The accepted spacing rule, from ACI 302.1R and ACI 360R (Guide to Design and Construction of Concrete Slabs on Ground), is to space joints 24 to 36 times the slab thickness, in inches. The thicker the slab, the farther apart the joints can be; the thinner the slab, the tighter they need to be.
For a 5-inch Calgary driveway, that math gives you a spacing window of roughly 10 to 15 feet (24 × 5 in = 120 in = 10 ft; 36 × 5 in = 180 in = 15 ft). A 4-inch slab tightens to about 8 to 12 feet. Two practical refinements come out of the ACI guidance and out of cold-climate flatwork practice:
- Stay toward the lower end of the range — closer to 10 feet than 15 — when the mix is wetter, the aggregate is finer, or the slab will see the kind of hard freeze-thaw swing Calgary delivers. More shrinkage potential means you want more frequent relief.
- Keep panels roughly square. Aim for a length-to-width ratio no greater than about 1.5 to 1. A long, skinny panel — say a 4-foot-wide strip running 16 feet — cracks across its narrow dimension almost every time, regardless of how the joints are spaced lengthwise. Break long runs into squarer rectangles.
So picture a standard 16-foot-wide, two-car Calgary driveway. A correct plan joints it into panels somewhere around 10 to 12 feet, both directions, producing tidy near-square sections. A driveway poured as two giant 16-by-20-foot slabs with a single joint down the middle is a cracking problem that has not happened yet. If you are looking at an existing driveway, pace off the distance between joints: more than about 15 feet between cuts on a 5-inch slab is outside the spec, and the mid-panel cracks you are seeing are the predictable result.
3. Cutting too late — the 4–12 hour window (as short as 1–4 hours in a Calgary summer)
You can get depth right and spacing right and still lose the slab to timing. Control joints have a window: cut them too early and the saw ravels and tears the green concrete, weakening the edge; cut them too late and the slab has already started shrinking and has already cracked on its own — your joint is now decorative.
For conventional wet-cut and early-entry sawing, ACI 302.1R describes a general window of roughly 4 to 12 hours after finishing for typical conditions. But that window is not a fixed number on the clock — it moves with how fast the concrete is setting, and in a Calgary summer it can slam shut fast. On a hot, dry, windy July afternoon, with the slab in full sun, the practical window can compress to as little as 1 to 4 hours. Heat and wind accelerate the set and pull moisture out of the surface; the concrete is ready to cut — and ready to crack — far sooner than it would be on a cool, overcast day.
This is exactly the variable the contractor controls and the homeowner almost never sees, because the cut often happens the evening of the pour or early the next morning, after everyone has gone home. In the opening example, 13 hours was simply too long for that slab in those conditions — by the time the saw came through, the concrete had already begun relieving its own shrinkage stress, and the joints could no longer dictate where the cracks went.
What you can ask, before the pour: “When are you planning to cut the joints, and how are you deciding the timing?” A crew that understands the window will talk about watching the set — checking whether the saw is raveling, adjusting for the day’s heat and wind — not about a fixed “we always come back the next morning.”
Early-entry saws (the lightweight saws designed to cut within the first few hours) exist precisely so the crew can hit the early end of the window on a fast-setting summer slab. If you are diagnosing a slab that already cracked between the joints, timing is one of the usual suspects, and the weather on pour day plus the time of the cut will usually tell the story.
4. Missing isolation joints at the apron/garage interface
Contraction joints (the saw cuts) handle shrinkage within one slab. But a driveway does not live alone — it butts up against a garage slab, a foundation wall, a sidewalk, front steps, a lamp-post footing. Those neighbours are independent pieces of concrete that move on their own schedule: the garage slab is poured at a different time, sits on different fill, and heaves and settles differently than the driveway in front of it.
An isolation joint (sometimes called an expansion joint) is the deliberate full-depth gap — typically a compressible filler strip — that separates the driveway from anything that moves differently, so neither one drags the other along.
ACI 332 (Residential Code Requirements for Structural Concrete) and ACI 302.1R both call for isolation joints wherever a slab abuts a fixed or independently-moving element. The classic Calgary failure point is the apron — the strip of driveway right at the garage door. If the driveway is poured tight against the garage slab with no isolation joint between them, the two slabs are locked together.
Then winter arrives: the exposed driveway freezes, heaves, and shifts on its own frost cycle while the garage slab — protected, often heated — stays put. With nowhere to move independently, the bond between them tears, and the crack shows up as a ragged line right across the apron, exactly where you drive in and out every day.
The same logic applies anywhere the driveway meets the house foundation, a sidewalk, or a step. Each of those is its own slab with its own movement, and each needs a clean isolation gap, not a hard concrete-to-concrete butt.
How to inspect it: look at the seam where the driveway meets the garage floor. You should see a defined joint — a filler strip, a clean gap, a sealed line — not two slabs cast solid into each other. If you can see that the concrete is monolithic across that line, the isolation joint is missing, and the apron is a likely place for a year-one crack.
Before a pour, the question is direct: “Are you putting isolation joints where the driveway meets the garage slab, the foundation, and the sidewalk?”
5. No re-entrant corner control (the L-shape diagonal crack)
The last mistake is the most diagnostic, because it leaves a signature crack you can identify on sight. A re-entrant corner is an inside corner — any point where the slab’s edge turns inward, creating an L-shape, a notch, or a cut-out. Driveways are full of them: the corner where the driveway wraps around to meet a walkway, the notch around a front step, the inside angle of an L-shaped drive, the corner cut out for a utility pedestal or a tree well.
Stress concentrates at re-entrant corners. As the slab shrinks, the tension has to “turn the corner” at that inside angle, and the geometry forces it to a single point. The concrete relieves that stress the only way it can: with a crack running diagonally out of the inside corner at roughly 45 degrees. A diagonal crack marching out of an inside corner is one of the most recognizable patterns in residential flatwork — ACI 302.1R specifically flags re-entrant corners as locations that need a control joint or added reinforcement.
The fix is built in before the pour, and it is cheap: place a control joint running diagonally out from the re-entrant corner, on the 45-degree line the crack would otherwise take, so the slab cracks down in the joint. On larger corners, the crew may also add short diagonal “crack-control” bars to hold the corner tight. Either way, the corner has to be deliberately addressed — a plain saw grid that ignores the inside corners leaves every one of them free to crack.
What to look at: walk the perimeter and find every inside corner. At each one, is there a joint angling out of it, or just blank slab? On a driveway you are buying or diagnosing, a diagonal crack out of a corner is the tell. On a driveway you are still planning, ask: “How are you handling the inside corners — are you running a diagonal control joint at each re-entrant corner?” If the crew looks blank at the term, that is your answer.
How the five decisions stack up
None of these five operates alone. A driveway that cracks in year one usually got more than one wrong — shallow joints and spacing that ran a little long, or cuts made too late on a hot day and a missing isolation joint at the garage. That is why the honest diagnosis is rarely “Calgary settling.” Calgary’s freeze-thaw cycling is real and harder on flatwork than a milder climate — but it does not cause mid-panel cracks on a correctly jointed slab. It exposes the slab that wasn’t.
All five decisions are verifiable, which is why we hand you the specs instead of the reassurance. Cut depth is a ratio you can measure. Spacing is a distance you can pace. Timing is a question with a real answer. Isolation joints and corner joints are either there or they are not. You do not need to pour concrete to hold a crew to these numbers — you just need to know what they are. Now you do.
FAQ
Q1: What is the 25% depth rule for concrete control joints? The 25% depth rule means a saw-cut control joint must be cut to at least one-quarter of the slab’s thickness, per ACI 302.1R. On a 5-inch (125 mm) Calgary driveway slab, that’s about 1.25 inches deep; on a 4-inch sidewalk it’s 1 inch; on a 6-inch slab it’s 1.5 inches. A shallower cut doesn’t create a reliable weak plane, so the slab cracks somewhere else — usually mid-panel where you can see it.
Q2: How soon after pouring should control joints be cut? For conventional sawing, ACI 302.1R describes a window of roughly 4 to 12 hours after finishing under typical conditions. But that window moves with the set: on a hot, dry, windy Calgary summer day with the slab in full sun, it can compress to as little as 1 to 4 hours.
Cut too early and the saw ravels the green concrete; cut too late and the slab has already cracked on its own. The crew should be timing the cut to the day’s conditions, not to a fixed “next morning” habit.
Q3: How far apart should control joints be on a driveway? ACI 302.1R and ACI 360R put joint spacing at 24 to 36 times the slab thickness in inches. For a 5-inch slab that’s about 10 to 15 feet, and for a 4-inch slab about 8 to 12 feet. Stay toward the lower end with wetter mixes and hard freeze-thaw exposure, and keep panels roughly square (length no more than about 1.5× the width) — long, skinny panels crack across their narrow dimension regardless of spacing.
Q4: What is a re-entrant corner crack? A re-entrant corner is an inside corner — an L-shape, notch, or cut-out in the slab, such as where a driveway wraps to a walkway or notches around a step or utility pedestal. Shrinkage stress concentrates at that inside angle, and the slab relieves it with a crack running diagonally out of the corner at about 45 degrees.
The fix is a control joint placed on that diagonal (sometimes with short diagonal reinforcing bars) so the slab cracks down in the joint instead of across the surface.
Q5: Why is my new Calgary driveway cracking between the joints? Cracking between the joints almost always means the jointing plan failed, not the concrete. The usual causes are joints cut shallower than 25% of slab thickness, joints spaced too far apart (beyond 24–36× thickness), or joints cut too late so the slab had already begun relieving its own shrinkage.
Calgary’s freeze-thaw cycling exposes these errors but doesn’t cause mid-panel cracks on a correctly jointed slab. A missing isolation joint at the garage apron or an uncontrolled inside corner produces its own distinct cracks.
Q6: What questions should I ask a contractor about control joints before they pour my driveway? Ask four things you can verify:
(1) “How deep are you cutting the joints, and what’s the slab thickness?” — the answer should be a ratio of at least 25%.
(2) “How far apart are the joints?” — it should fall inside the 24–36× spacing window.
(3) “When are you cutting, and how are you deciding the timing?” — they should talk about watching the set, not a fixed schedule.
(4) “Are you isolating the driveway from the garage slab and running a diagonal joint at each inside corner?”
A crew that can answer all four in specifics is a crew that measures these things.
Sources
- ACI 302.1R — Guide to Concrete Floor and Slab Construction (joint depth, spacing, and timing) — https://www.concrete.org
- ACI 360R — Guide to Design and Construction of Concrete Slabs on Ground (joint spacing) — https://www.concrete.org
- ACI 332 — Residential Code Requirements for Structural Concrete (isolation joints at independently-moving elements) — https://www.concrete.org
- CSA A23.1:24 — Concrete materials and methods of concrete construction (finishing and jointing requirements) — https://www.csagroup.org
- Concrete Alberta — flatwork finishing bulletins — https://concretealberta.ca
About Omega Ready Mix
Omega Ready Mix (est. 2023) is a Calgary concrete supplier built on the Transparent Challenger principle: hand homeowners and contractors the exact specs and questions they need to hold any pour to standard. We supply mix designs that meet CSA A23.1:24 and ASTM C685/C685M-25a, and we believe a slab you can verify is a slab you can trust.
Don’t Let a Good Driveway Crack Because of Bad Jointing
Control joints only work when they’re cut to the correct depth, spaced properly, and installed at the right time. Omega Ready Mix supplies CSA A23.1:24-compliant concrete for Calgary residential driveways and provides the documentation contractors need for inspection.
If you’re planning a driveway or garage pad, we’ll help you choose the right mix, explain the specifications that matter, and make sure your concrete supports a long-lasting slab—not one that starts cracking after its first winter.
Contact Omega Ready Mix today for a quote or to discuss the right concrete mix for your driveway project.